
Introduction
The electric bicycle revolution is gaining momentum, as more individuals embrace the benefits and enjoyment of e-biking daily. At Troxus, we are proud to lead this movement, equipping first-time riders with the essential knowledge needed for confident riding. This comprehensive guide will cover everything from understanding your e-bike's basic functions to advanced tips for enhancing your riding experience.
Content
Understanding Your E-Bike's Basic Functions
Achieving the Most Comfortable Riding Position
The Importance of Regular Maintenance
Maximizing Your E-Bike's Performance
Environmental Benefits of E-Bikes
Understanding Your E-Bike's Basic Functions
The control panel of your e-bike includes buttons for various functions like light control, display settings, and power on/off. Becoming familiar with each button's purpose enhances the safety and enjoyment of your ride. The control panel supports adjustable positioning, allowing you to adjust its placement according to your personal usage preferences.

- Button 1 is the light control button.
- Button 2 is the display function button.
- Buttons 3 and 4 are up/down
- Button 5 is the power on/off button.
This acts as the dashboard for vital riding data, such as battery life, speed, and pedal-assist levels. Navigating the display effectively keeps you informed throughout your ride, enabling smarter decisions.
Press the Button 5 on the left control to turn the bike on.
Ebikes offer different levels of pedal assist, allowing you to adjust the support according to your needs. Experiment with each level to discover what complements your riding style best, especially beneficial for hill climbs or conserving battery on long rides.
Use buttons 3 and 4 to check if the pedal assists system buttons 1-5 work, and note that mode 0 is the non-assisted mode.
Monitoring your battery life is crucial for planning rides. A full charge is indispensable for extended journeys, ensuring you aren't left stranded. If you're planning a long-distance ride, make sure your battery can support the round-trip journey. If the distance exceeds the battery capacity, consider carrying a spare battery for replacement. You can purchase Troxus batteries here.

Front and brake lights are essential for visibility and safety. Always test them before a ride to confirm proper function. Adequate lighting is vital for being seen, particularly in low-light conditions.
Press button 1 to check if the front light turns on.
 |
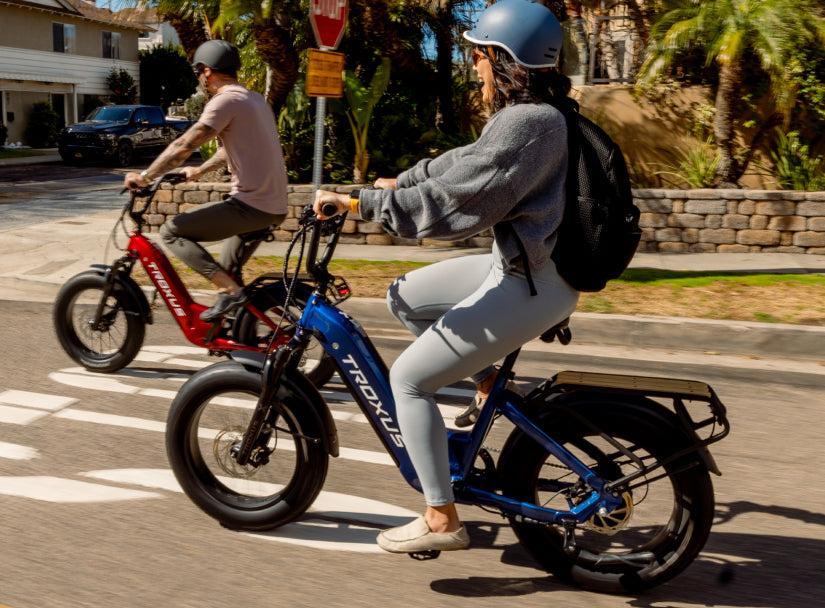
Troxus Lynx Plus 20" Fat Tire E-Bike |
Achieving the Most Comfortable Riding Position
Utilize methods like the Holmes or Heel Method to determine the optimal saddle height. Adjust the angle for maximum support and comfort, preventing discomfort and injuries on long rides.
Holmes Method: Position your foot at 6 o'clock on the pedal with the correct pedaling habit. At this point, the folding angle between your thigh and calf should be between 145-155 degrees. This height of the saddle is the height you need.

Heel Method: Get on the ebike and put your heel on the pedal. It is better to have a bike stand. If you need help, you can ask your friend to help you slowly pedal forward or backward. If the saddle is too high, your body will sway and be unstable. Then you must move your saddle down by 1-2cm until the swaying disappears. On the contrary, if you can easily reach the pedal, you can raise it a few centimeters until you start to sway and lower the saddle to your ideal height.

Saddle Angle: Generally, when your pedal is around 5 o'clock, the bending angle of your knee is acceptable between 30-40 degrees. Combined with the data measured just now, further, adjust the position of your saddle.

Adjust the angle of the saddle. Generally, the angle is between 0 and -6 degrees, which means horizontal or within 6 degrees of the nose pointing downward. It can be adjusted according to the support effect the saddle brings to you during riding. Generally, the nose should not be raised because your sit bones are difficult or unsupported. If the nose is lowered too much, although the sit bones are better supported, it will also require more strength from your arms to keep your body, resulting in a loss of control.

Proper handlebar height and angle significantly affect comfort and control. Tailor them to your body and riding style, as ergonomic handlebars can reduce strain on wrists and shoulders. When holding the brake lever, the palm and arm should be folded around 35-45 degrees. Make sure to position the brake lever in the best, most accurate, and most natural position possible to minimize the chance of danger (0-90 degrees adjustment display). Adjust the handlebar by rotating it to be centered and perpendicular to the wheels' direction (you can use the mudguard as a reference).

Safety is paramount. Conduct a pre-ride check every time to ensure your e-bike functions perfectly. Examine brakes, tires, and lights for optimal performance.
Ensure the handlebar cable routing is correct when installing the handlebar. Entirely turn the handlebar to the left and right to ensure that it does not pull on any cables or wires.
Verify that pedals are securely fastened to prevent them from loosening while riding. Loose pedals can lead to accidents, so ensure they are tightly secured.
Inspect all cable connections for secure attachment, ensuring no signs of loosening. Loose cables can impact the e-bike's performance, making regular checks necessary.
- Without applying the throttle: Squeeze the left brake lever to lock the front brake, then try to push the bike forward using the handlebar. The front wheel should not slip. Squeeze the right brake lever to lock the rear brake, then try to make the bike ahead using the handlebar. The rear wheel should not slip.
- With the throttle applied: Start the bike in an open, spacious area. Wear appropriate safety gear and clothing, and sit on the bike. Hold down the right brake lever to lock the rear brake; lightly press the assist button. Due to the brake being applied, the bike should not move. Press the assist button. Release the brake. Test if the throttle now operates without engaging the brake.
Note: The brake (regenerative brake) may produce slight friction during the first few rides. It is usually squeaking, or the noise will disappear with use.
Dress for the Ride
Wear a properly fitted helmet and adjust it for comfort. A helmet is key for safety, significantly reducing the risk of head injuries in accidents.

- Wear a properly fitting helmet. Choose the correct size and type of helmet.
- Ensure there is a two-finger width between the helmet and brow.
- Adjust and fasten the chin strap to form a "Y" shape on both sides of the head, below the ears.
- Leave about half an inch (13mm) of space between the chin and the helmet strap.
Appropriate Clothing and Footwear
Choose simple, well-fitting clothes to avoid wearing loose or overly long clothing that may catch in the bike's tires. Choose flat or athletic shoes to better control overall speed and pedal sensation.
In conclusion, it is essential to follow the instructions carefully and perform the pre-ride check to ensure your safety. Remember to adjust your saddle and handlebar to the most comfortable riding angle and wear appropriate safety gear, including a helmet. If you have any questions or concerns, please contact Troxus through email or phone.
The Importance of Regular Maintenance
Proper battery maintenance is crucial for extending your e-bike's lifespan and ensuring optimal performance. Store your battery in a cool, dry place, and follow the manufacturer's charging guidelines. This approach will help maintain its efficiency and reliability.
Regular upkeep of your e-bike's motor and drivetrain is essential. Keep the chain clean and well-lubricated, and inspect the motor for any signs of wear or damage. Consistent maintenance can prevent significant issues and ensure a smooth ride.
Your safety depends on well-maintained brakes. Regularly check brake pads for wear and adjust the brake calipers to maintain even braking pressure. Prioritizing brake maintenance is critical for a secure riding experience.
Inspect tires regularly for pressure, cuts, punctures, or signs of wear. Properly inflated tires not only enhance ride quality but also reduce the risk of flats, contributing to a safer and more enjoyable journey.
Ensure all lights are functioning correctly and replace any burnt-out bulbs. Adequate lighting is vital for visibility and safety, particularly in low-light conditions.
Maximizing Your E-Bike's Performance
Achieving proper weight distribution while riding enhances balance and control. This practice contributes to a smoother and more stable ride, ensuring a better cycling experience.
Effectively using a combination of throttle and pedal assist maximizes your e-bike's efficiency and range. Understanding these features will help you make the most of your e-bike.
Adopt an aerodynamic riding position and minimize accessories to reduce wind resistance. This strategy can increase your speed and conserve energy during rides.
Plan routes to avoid steep hills or headwinds to conserve energy. Thoughtful route planning enhances ride efficiency and enjoyment.
Keep your e-bike's software updated to ensure optimal performance and access to the latest features. Regular updates enhance both functionality and performance.
Environmental Benefits of E-Bikes
E-bikes produce zero emissions, contributing to combating climate change and improving air quality. Choosing an e-bike supports environmental preservation. Explore more about electric bikes as the future of green transportation.
Decreased Dependency on Fossil Fuels
Opting for an e-bike reduces reliance on gasoline and fossil fuels, promoting a more sustainable future and eco-friendly transportation choices.
E-bikes serve as a practical alternative to cars, particularly for short trips, helping reduce traffic congestion and commute times in urban areas.
The growing use of e-bikes increases demand for renewable energy sources, driving the adoption of cleaner energy solutions and promoting sustainability.
Nearly silent operation of e-bikes contributes to reducing noise pollution in urban areas, making cities quieter and more pleasant places to live.
The Future of E-Bikes
Smart e-bikes, equipped with features like smartphone connectivity for tracking and diagnostics, are revolutionizing how we ride. These e-bikes deliver enhanced functionality and convenience, making them an invaluable asset for modern riders.
Advancements in battery technology are crucial, offering promises of longer ranges and quicker charging times. Such improvements can significantly enhance the practicality of e-bikes for extended journeys, making them a viable option for more riders.
E-bikes are gaining traction in the tourism sector, with numerous destinations now offering e-bike tours and trails. This trend opens up exciting opportunities for tourists to explore new landscapes in an enjoyable and accessible manner.
Conclusion
Understanding your e-bike's features and conducting pre-ride checks are crucial for ensuring a safe and enjoyable experience. Adjust your saddle and handlebars for optimal comfort, wear suitable safety gear, and if you have any questions or concerns, know that Troxus is readily available via email or phone. By embarking on your e-bike journey, you're opting for a fun and efficient transportation mode while contributing to a greener, more sustainable future. Happy riding!